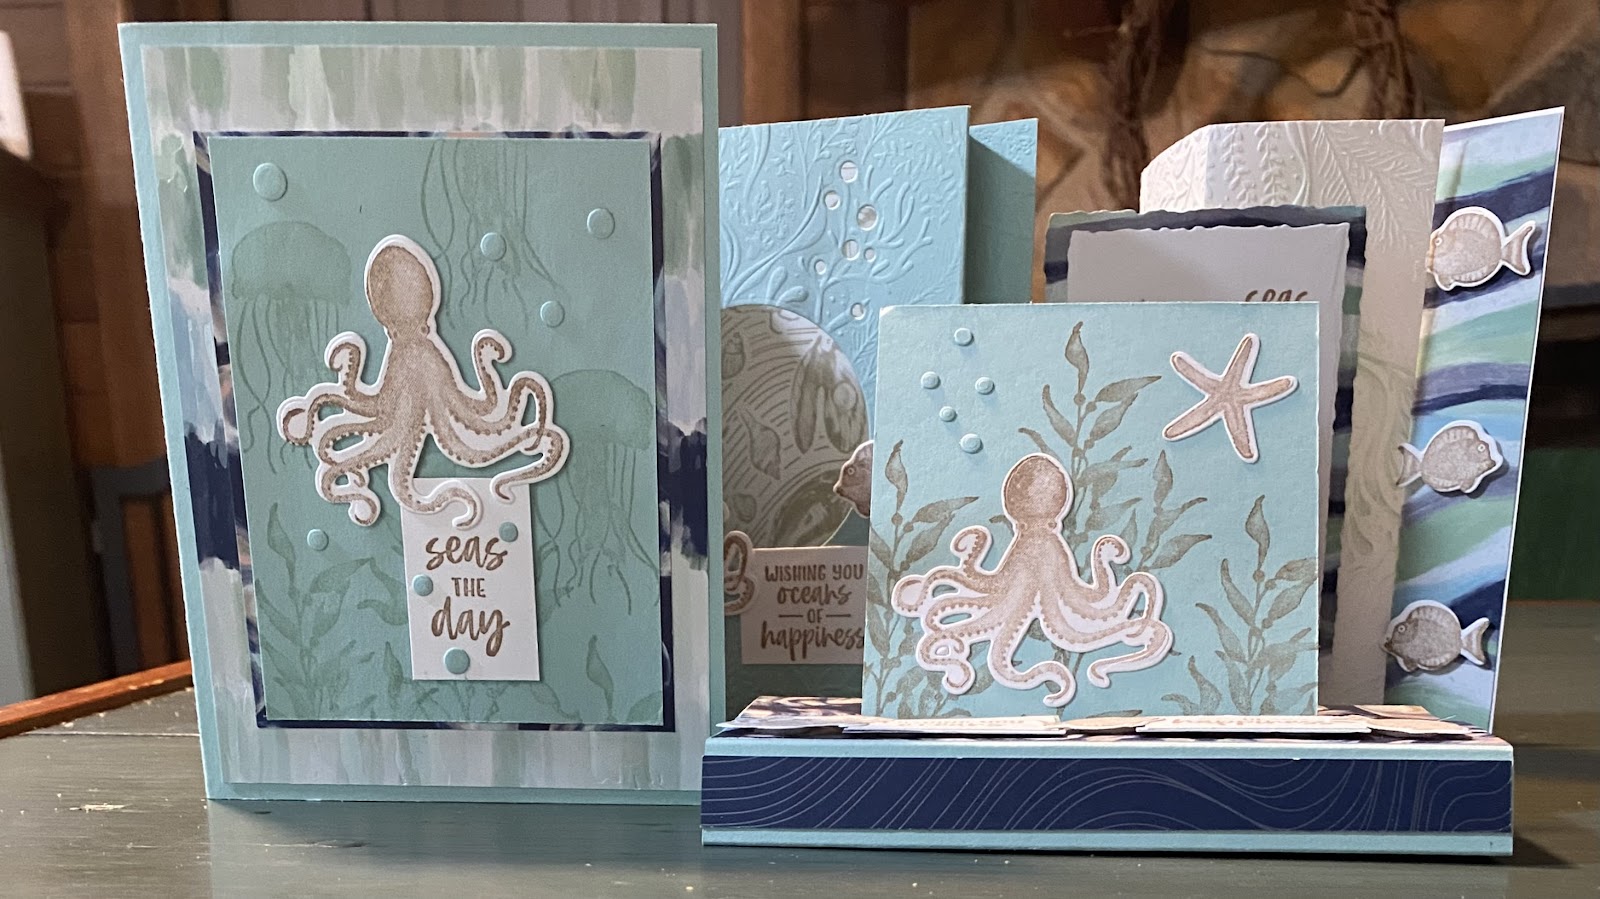
I really enjoyed making these cards I feel the style of this fancy fold is perfect for this designer paper and suite.
Here is the video link https://youtu.be/WcU8_KGxDvo and here are two cards that were made


I really enjoyed making these cards I feel the style of this fancy fold is perfect for this designer paper and suite.
Here is the video link https://youtu.be/WcU8_KGxDvo and here are two cards that were made

Directions :
Score white cardstock at 3 ⅛ inches- this is the card. Larger circle will be glued centrally at a ½ inch from the top onto the front of this card- Glue the strip of DSP to the bottom and above it stamp your sentiment . Glue white card to center of the colored cardstock piece after adhering the 4 by 5 ¼ DSP to the front. Now fold the 5 by 5 DSP in half twice and cut one of the squares off.have the cut off piece at the bottom right and fold left square up and left over single flap - you now have a much smaller square/ turn it over and fold down front flap into a triangle. Glue back parts together. The upper right corner of bookmark should be able to go over the front of the card. Place a small circle with a die cut image onto the front of the triangular piece.
May 5 th & 6th, 2023
By: Renee Ewart
Center Push /Pop Through Card :
Colored Base Cardstock (CSB) 5 ½ x 8 ½ & 3 ½ x 4 ¼
White cardstock (CSW) 3 ¼ x 4 & strip 4 x 1 , extra scrap for fussy cutting
Designer Paper (DSP) optional- 3 ¼ x 4, 2(½ x 5 ½ ). 2 to 4 ( 1 ¼ )
Scoring of CSB : 81/2 by 5 ½ - long side: @ ¾, 2 ⅛, 4 ¼, 5 ⅝, 6 ⅛ and 7 ¾.
Slit : cut from 1” to 4 ½ at 4 ¼ scoreline. To cut the slit you will need to slide the folded card through the cutter at a 1/16 of an inch or less.
Folding CSB: all will be mountain folds and represent the front of the card.
List of tools: A stamping Bundle, cardstock, designer paper, ink pads, snips, adhesives and cutting and scoring tool. *You are ready to assemble : if you need help you may contact me through my Facebook page: https://www.facebook.com/Renees-Paper-Crafts- OR- Directions on YouTube https://youtu.be/3HN--
May 5th & 6th, 2023
By: Renee Ewart
Diorama Card
Colored Base Card (CSB) 7 ¼ by 5½. White cardstock (CSW) 7 ¼ by 5 ½. Designer Paper (DSP) 4 by 5 ¼. Complimentary Color cardstock for die cut pieces that represent your image, no larger than 3 ½ (across) by 2 (high). Label of light color or white cardstock no bigger than 1 ¼ by 2.
Scoring of CSB: Both 7 ¼ and by 5 ½ pieces are scored on the long side, each end, at ¾ and 1 ½ inches.
To assemble: Stamp the front of your colored cardstock. Now fold score lines of the colored cardstock, making sure the front of the card is facing you. The 1 ½ score line creates a mountain fold and the ¾ inch score line creates a valley fold. White Cardstock will be folded in the same manner making sure the back of the card, not the inside, is facing you. Using a die, cut out the center window with an oval, circular or any shape you like. Be sure that the die is not larger than 2 ½ by 4. If there is any stamping, you should stamp your sentiment on the label and also on the back white card.
Gluing: Glue your designer paper to the inside of your white cardstock, make sure you are gluing it to the side that is concave. Now glue your ¾ inch ends together. Glue one side at a time and flatten the two pieces for easy gluing. Now you are ready to decorate your front. Simply glue pieces to the edges and/or to the top and bottom.
List of tools: A stamping Bundle, cardstock, designer paper, ink pads, snips, adhesives and cutting and scoring tool. You are ready to assemble. If you need help, you may contact me through my Facebook page: https://www.facebook.com/Renees-Paper-Crafts-
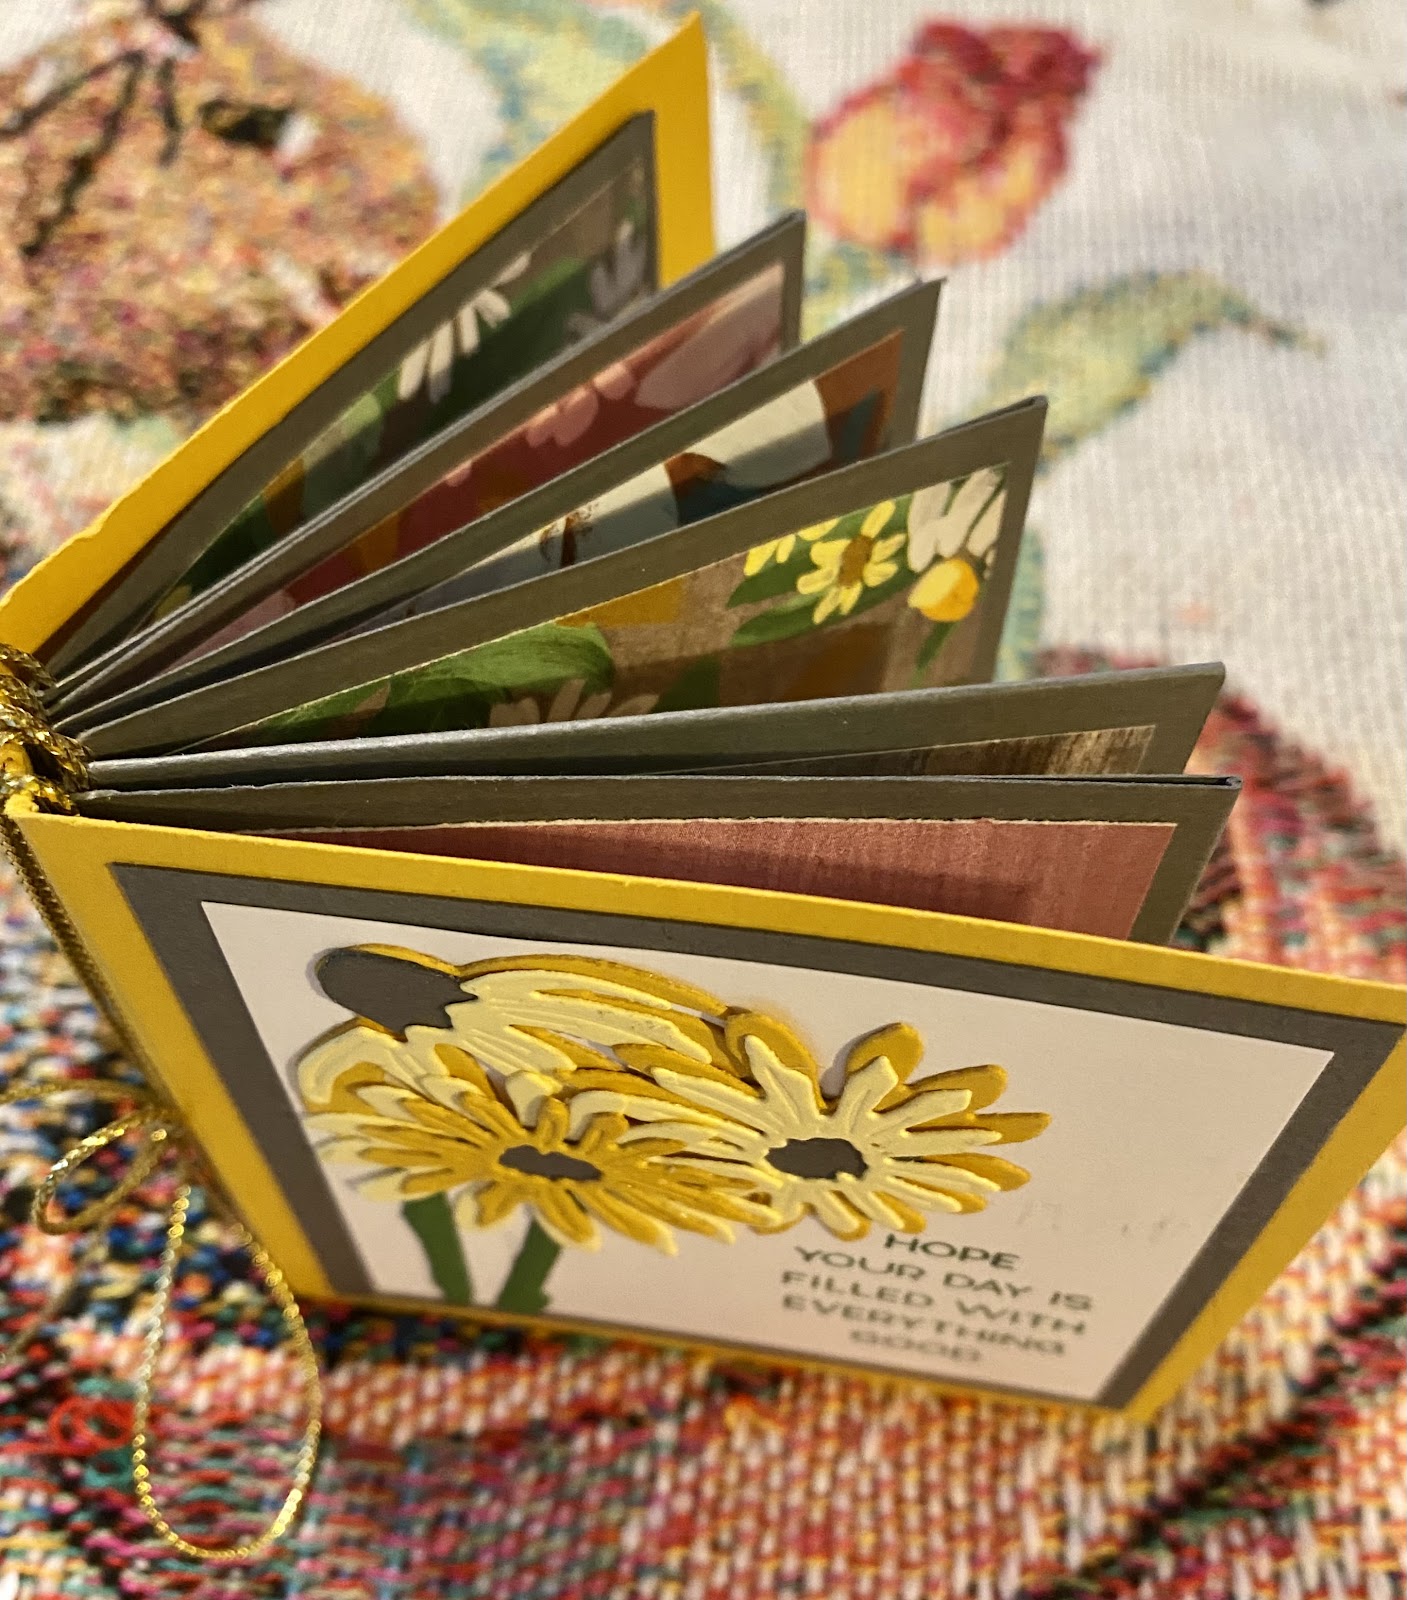
Card base can be any color: 8 ¼ by 11 score every 2 ¾ of an inch both sides. Long side 2 ¾ , 5 ½ and 8 ¼. Short side 2 ¾ and 5 ½. Designer paper squares are 2 ½ by 2 ½ . Anywhere from 7 to 14 depending if you want one side or both sides covered with dsp. Book cover 7 by 3 score long side at 3 ¾ and 3 ¼. Reinforce your binding with ¼ by 3 place strip on the outside and inside of the binding. You will wrap book with twine to the binding. To do this simply wrap each page around with the twine and at the end tie a bow. I.E. wrap first page to 2nd page, page 2 & 3,3 & 4,4 & 5 etc… You are ready to design your book. Good luck and have fun!
Steps: So you will be cutting up from the bottom and the top of the short side. Identify what is the top and bottom of your short side. Cut from the bottom 1st left square all the way through 3 of the 4 squares. Now turn your sheet so the top is now your bottom and cut from the left as before. Your cuts should be opposite from each other. It does not matter now what is top or bottom- You will fold accordion style the entire piece. Be careful to be as exact as possible when folding, use a bone folder to keep tight and straight. Number your accordion and glue together the following glue pages 2 and 3 , 4 & 5, 6 & 7, 8 & 9 and 10 & 11.
.
List of tools: A stamping Bundle, cardstock, designer paper, ink pads, snips, adhesives and cutting and scoring tools. You are ready to assemble. If you need help, you may contact me through my Facebook page: https://www.facebook.com/Renees-Paper-Crafts-

Card base can be any color : 11 by 4 ¼ scored on long side at 5 ½ ,4 ½ and 2 ¼
Steps:
I glue down the 4 by 5 ½ dsp piece to the back of the 1 ¼ inch strip at front of the card. I then place the ½ inch strips at right edge of inside card and the other up against the right edge of 1 ¼ inch front piece of card. Then I stamp all my pieces . You will glue the dsp 3 by 41/4 piece with the stamped image piece that is the 2 ¾ by 4. Now glue to center front of card and add embellishments.
List of tools:
A stamping Bundle, cardstock, designer paper, ink pads, snips, adhesives and cutting and scoring tool. *You are ready to assemble : if you need help you may contact me through my Facebook page: https://www.facebook.com/Renees-Paper-Crafts-
Card base can be any color : 8 ½ by 5 ½ scored on long side at 4 ¼ and front of card cut at 3 inches leaving 1 ¼ behind - cardstock left behind will be used for front of card and label : if cardstock is white cut to 2’¾ by 4 ( if too dark for stamping substitute for white cardstock. White Cardstock scrap: for punch out or die cut image and/ or larger label Embellishments : ribbon and or sequins Designer paper : 3 by 4 ¼ as frame for stamped area. 2 strips at ½ by 5 ½. Inside cardbase: (if not not white )then you will need white cardstock which will be around 3 ½ by 5 ¼.
Steps:
I glue down the 4 by 5 ½ dsp piece to the back of the 1 ¼ inch strip at front of the card. I then place the ½ inch strips at right edge of inside card and the other up against the right edge of 1 ¼ inch front piece of card. Then I stamp all my pieces . You will glue the dsp 3 by 41/4 piece with the stamped image piece that is the 2 ¾ by 4. Now glue to center front of card and add embellishments.
List of tools:
A stamping Bundle, cardstock, designer paper, ink pads, snips, adhesives and cutting and scoring tool. *You are ready to assemble : if you need help you may contact me through my Facebook page: https://www.facebook.com/Renees-Paper-
I really enjoyed making these cards I feel the style of this fancy fold is perfect for this designer paper and suite. Here is the video l...