Sunday, May 7, 2023

Mini book greeting card


Annual Crafting Retreat 

May 5th & 6th, 2023                                                          By: (written )Renee Ewart.   Thanks to Bethany Barnard   
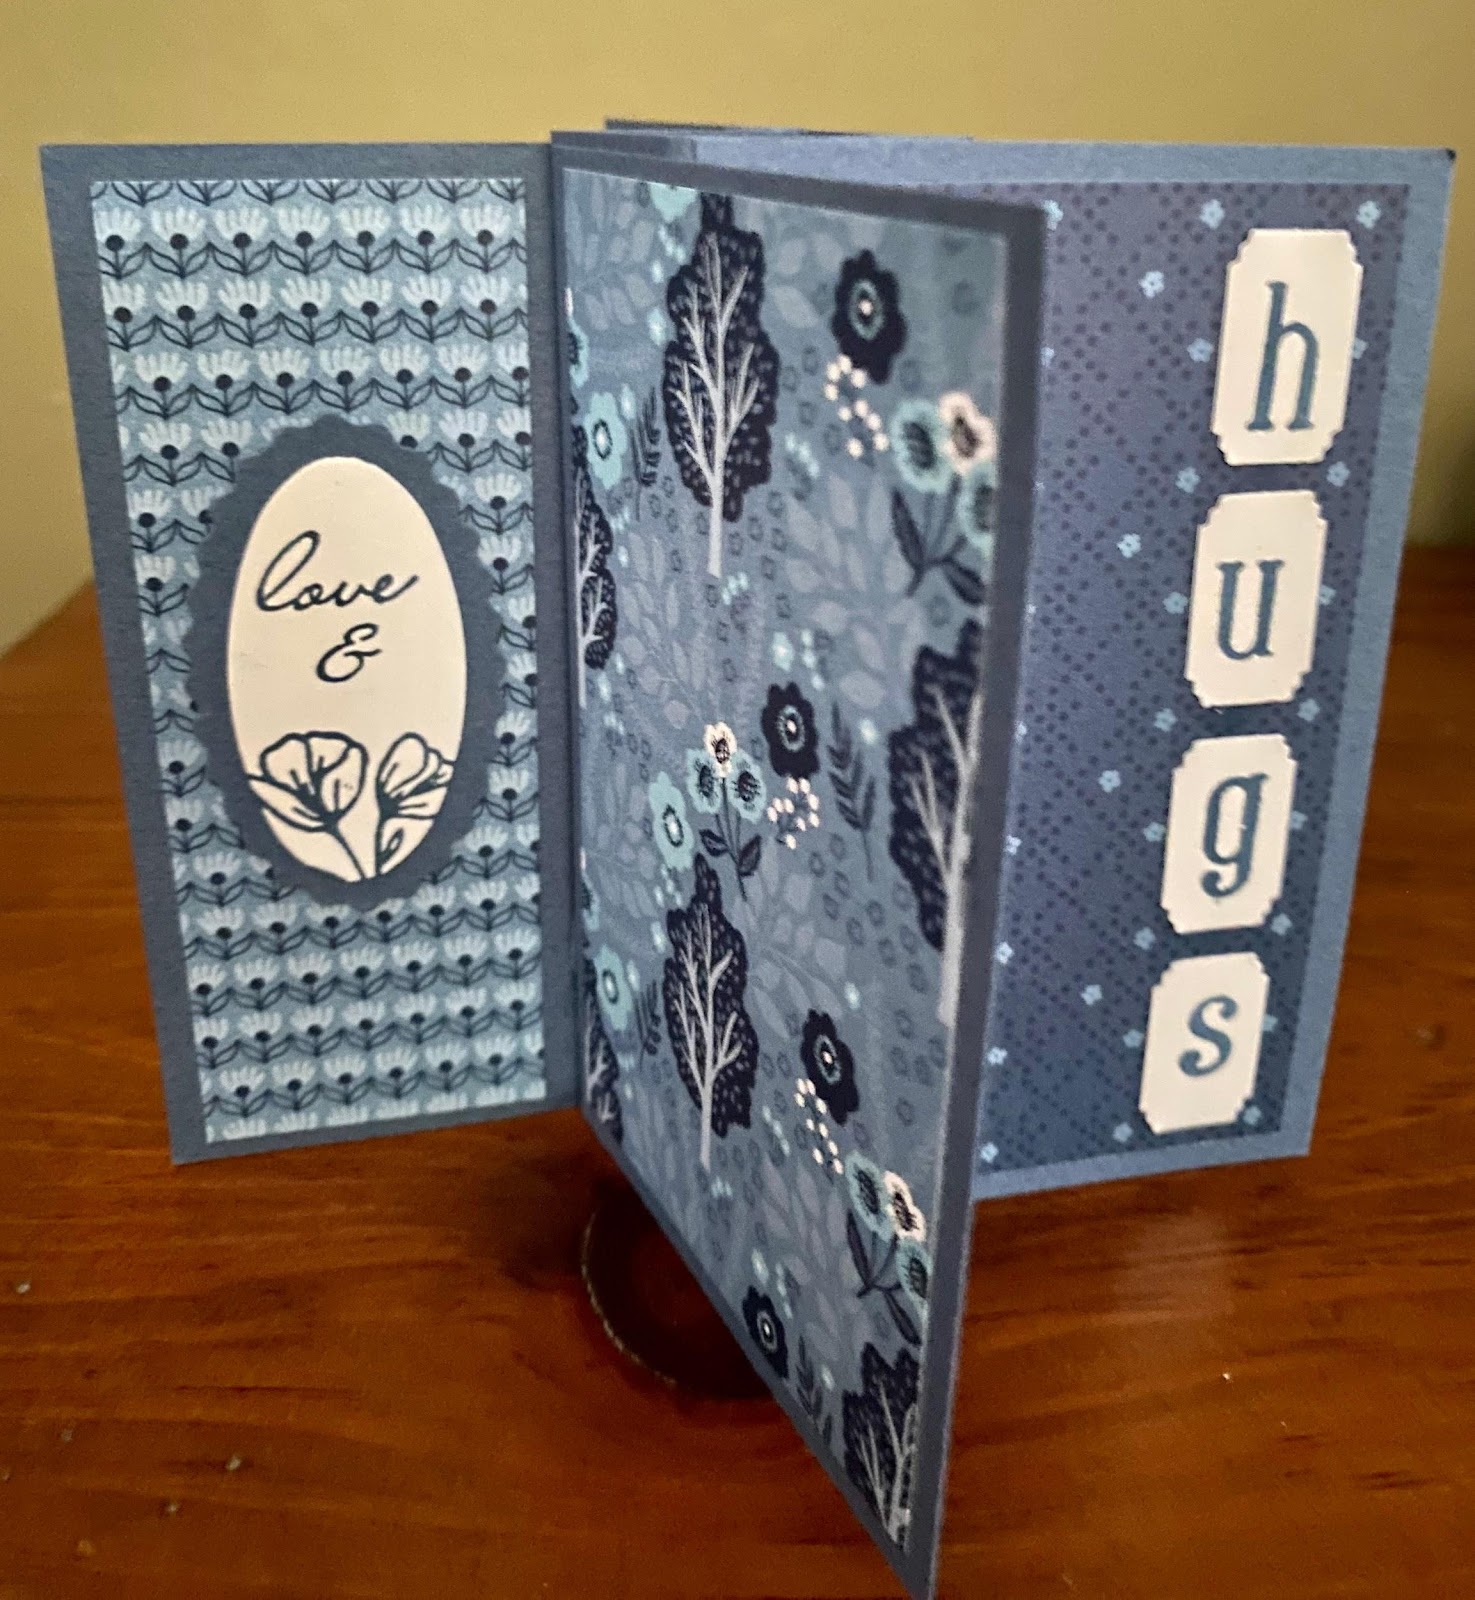
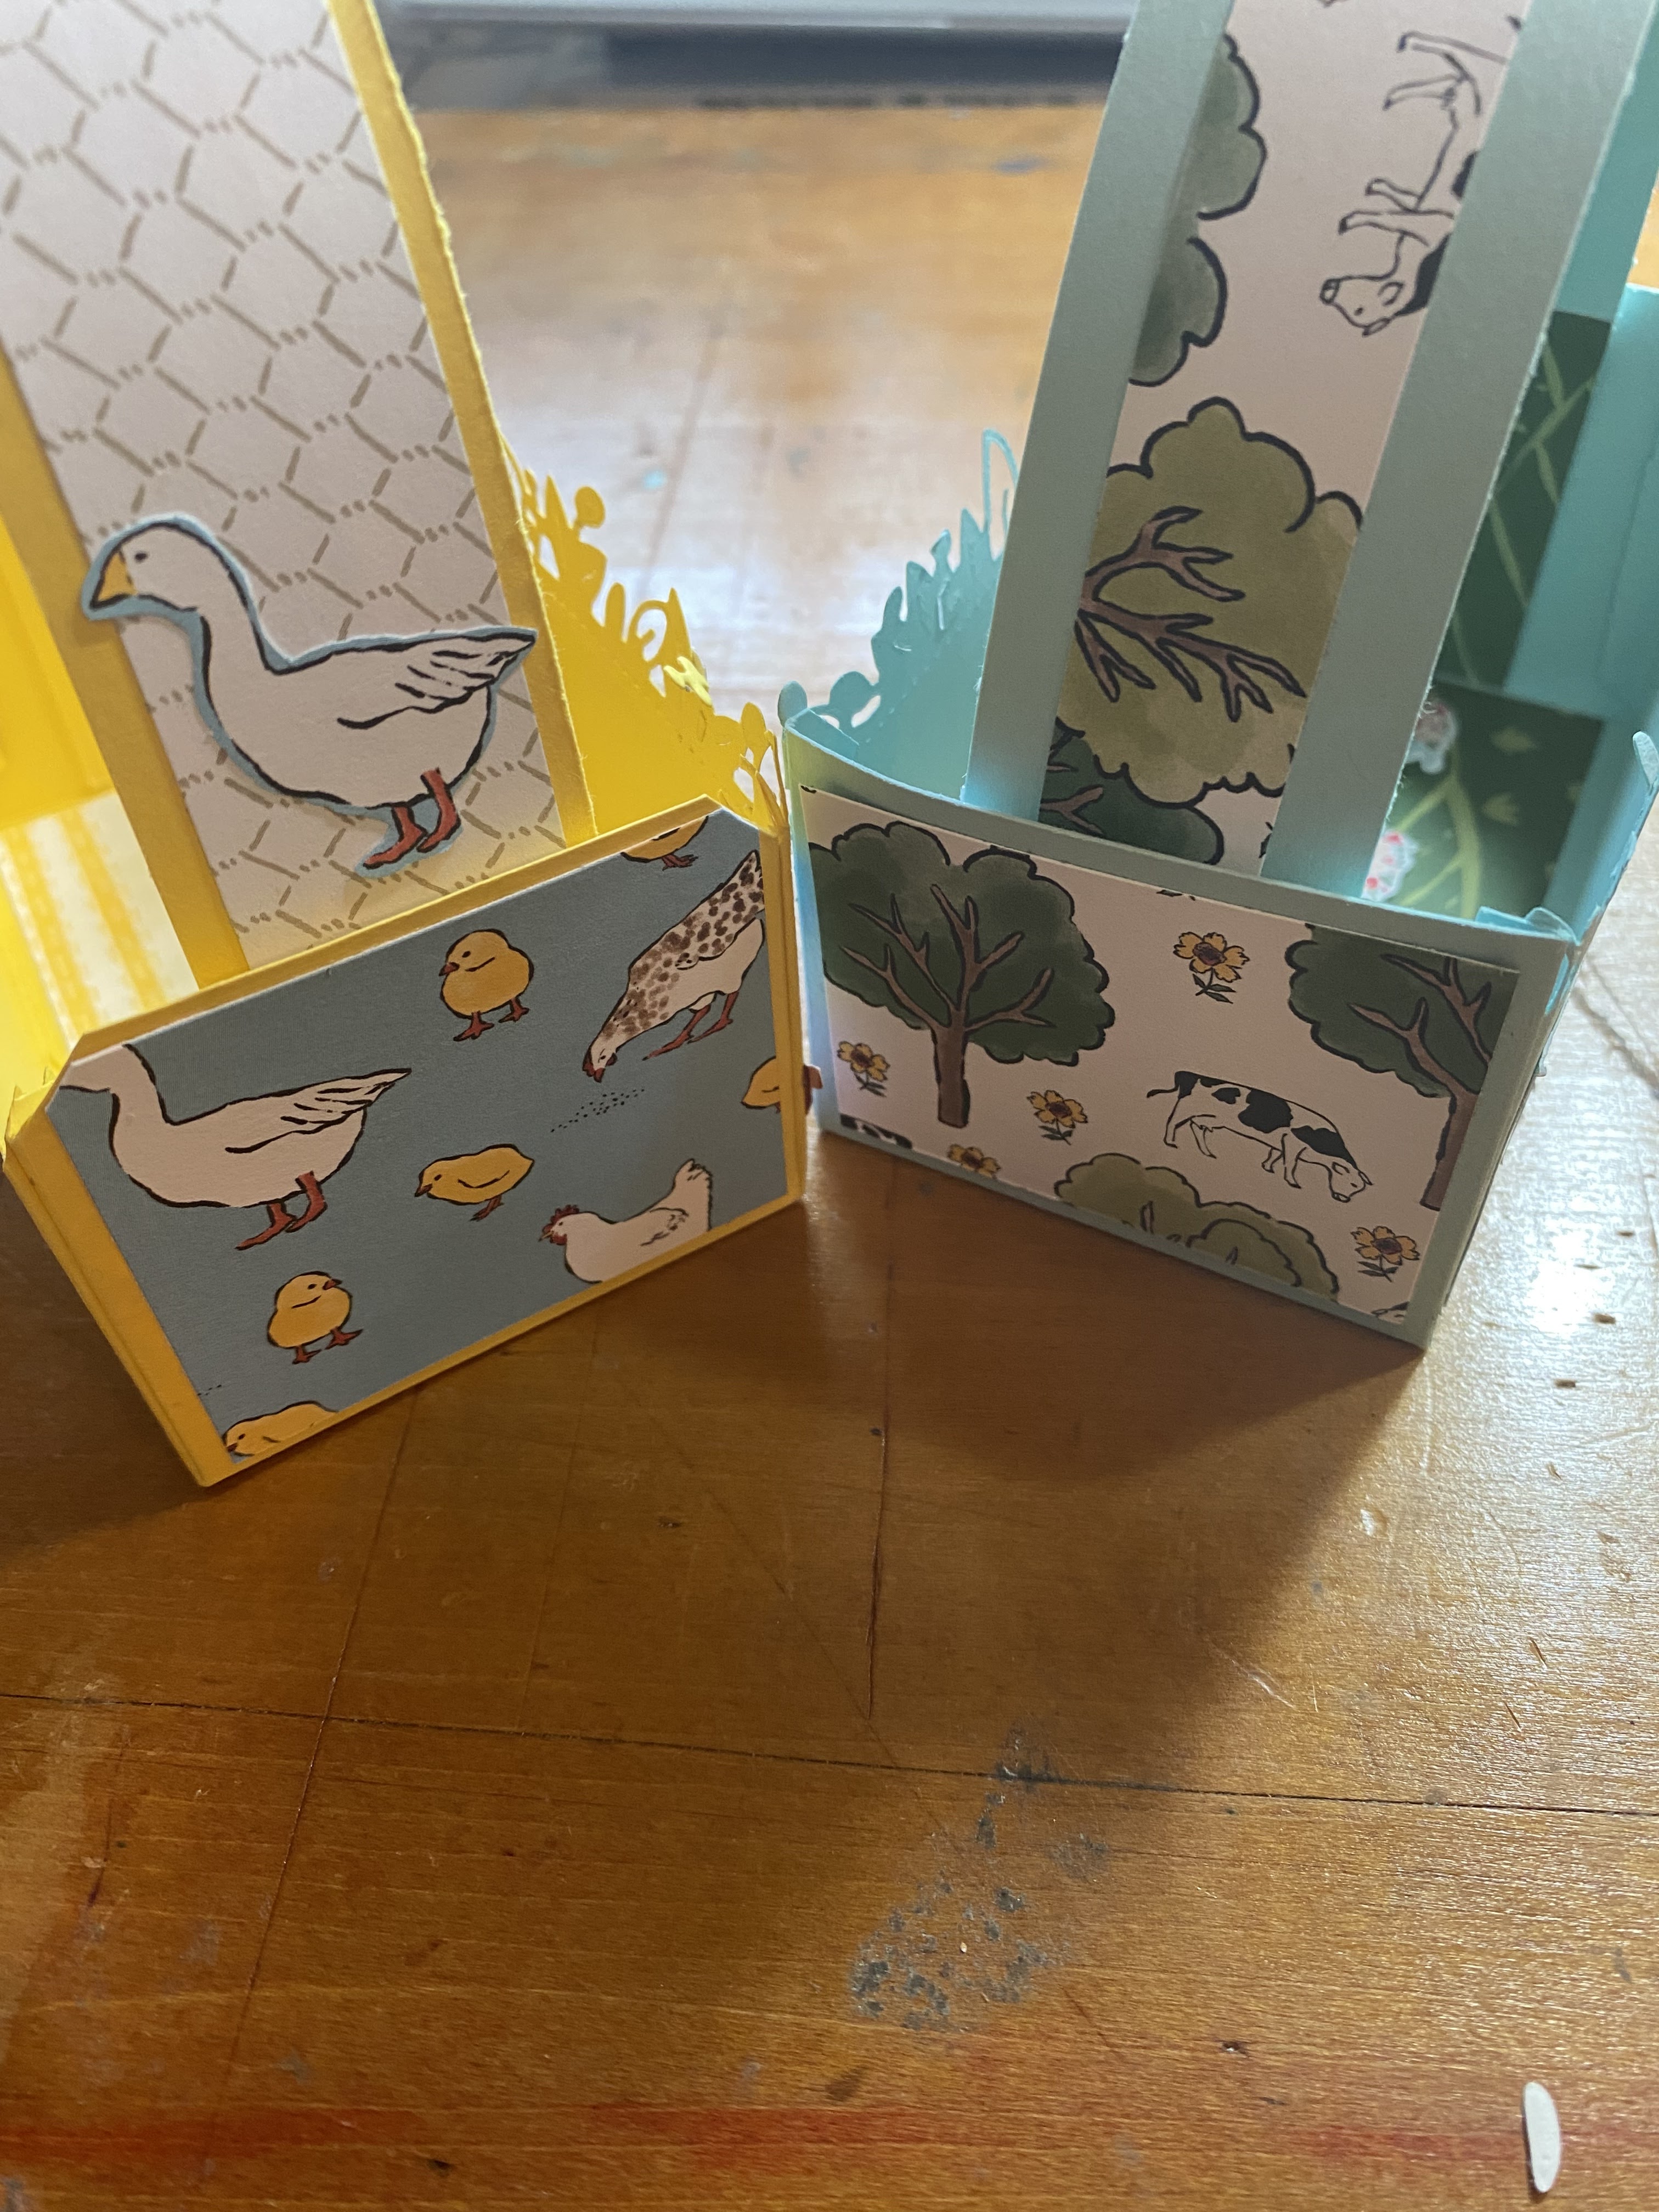
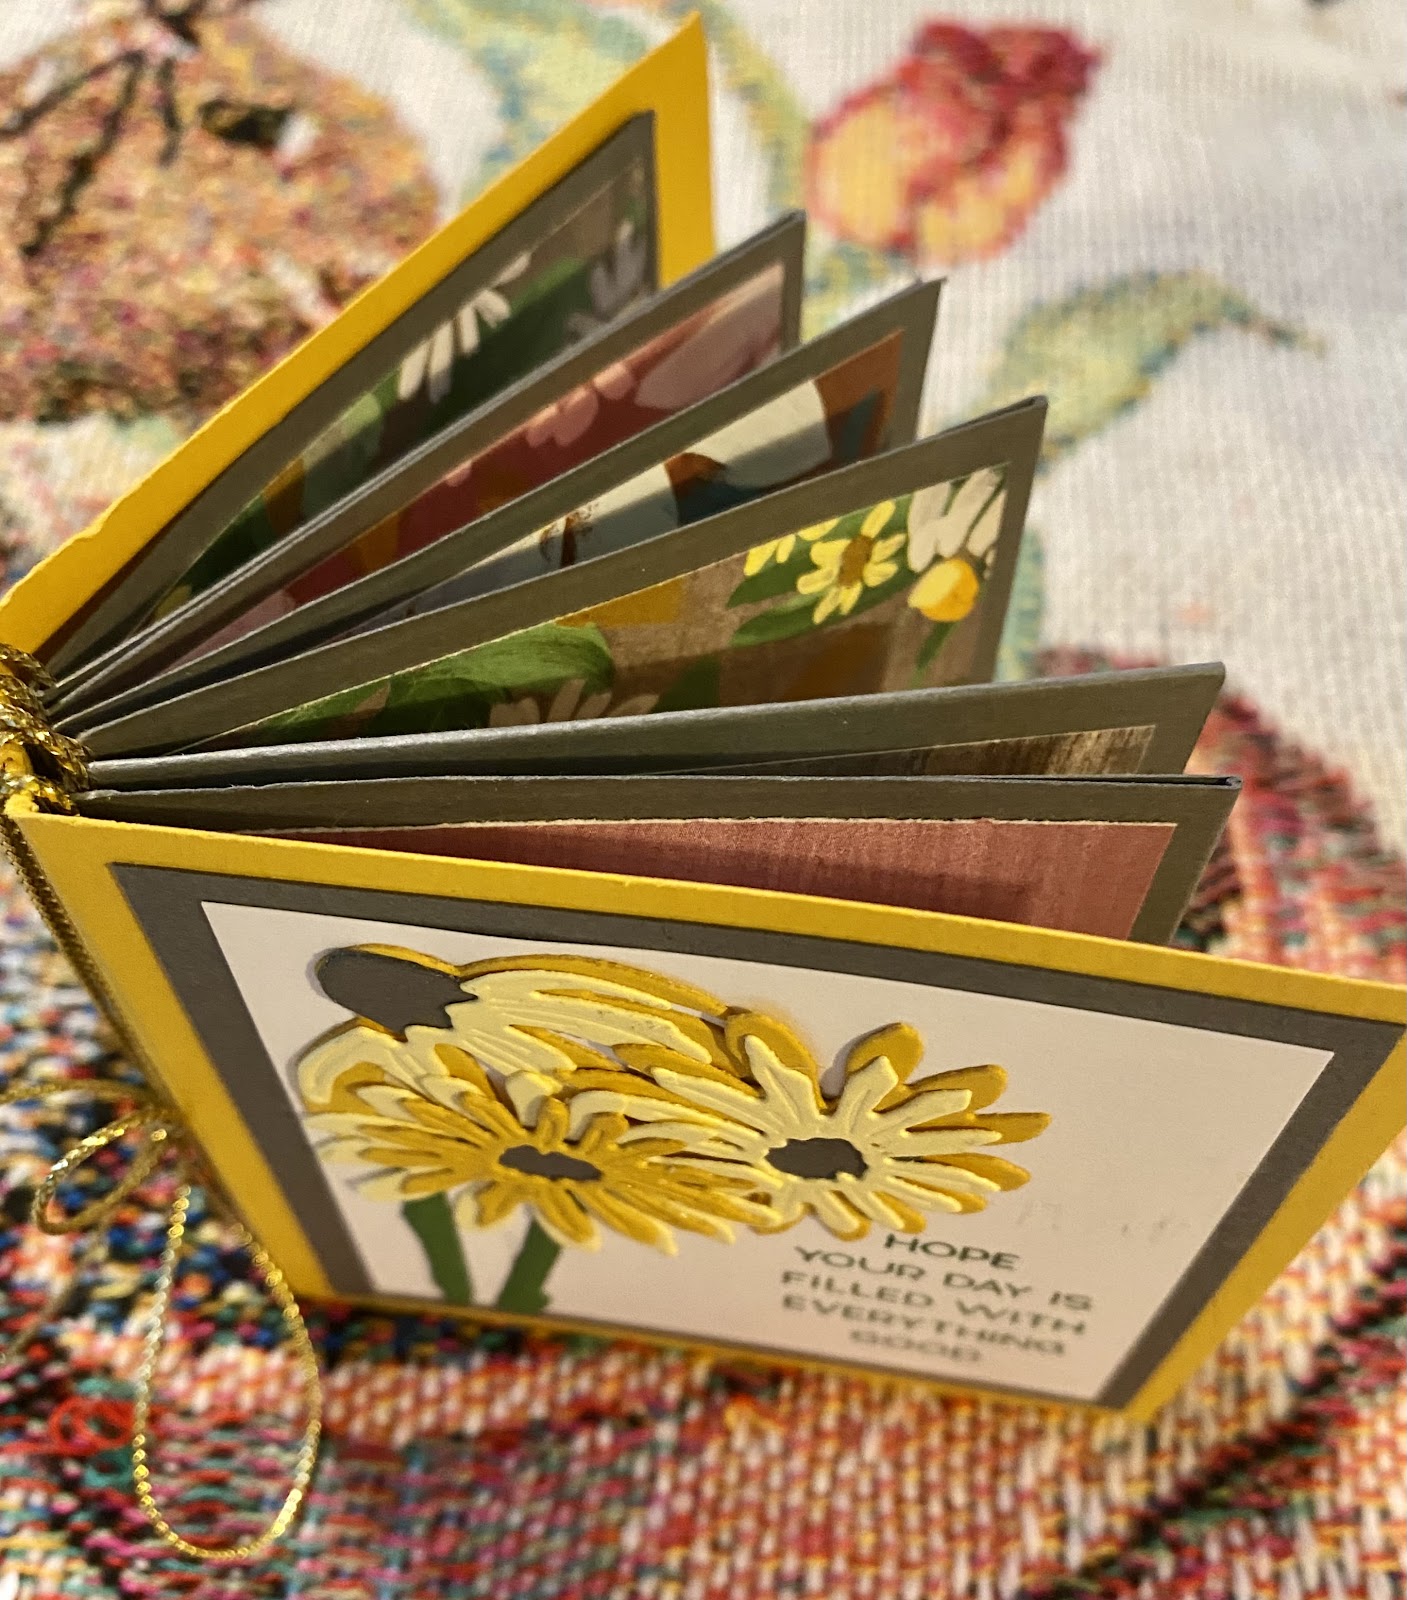
Mini Book   


Materials & Measurements: 

First measurement represents orientation. 

Card base can be any color: 8 ¼ by 11 score every 2 ¾ of an inch both sides. Long side 2 ¾ , 5 ½ and 8 ¼.  Short side 2 ¾ and 5 ½. Designer paper squares are 2 ½ by 2 ½ . Anywhere from 7 to 14 depending if you want one side or both sides covered with dsp. Book cover 7 by 3 score long side at 3 ¾  and 3 ¼. Reinforce your binding with ¼  by 3 place strip on the outside and inside  of the binding. You will wrap book with twine to the binding. To do this simply wrap each page around with the twine and at the end tie a bow. I.E. wrap first page to 2nd page, page 2 & 3,3 & 4,4 & 5 etc… You are ready to design your book. Good luck and have fun! 


Steps:    So you will be cutting up from the bottom and the top of the short side. Identify what is the top and bottom of your short side. Cut from the bottom 1st left square all the way through 3 of the 4 squares.  Now turn your sheet so the top is now your bottom and cut from the left as before. Your cuts should be opposite from each other. It does not matter now what is top or bottom- You will fold accordion style the entire piece. Be careful to be as exact as possible when folding, use a bone folder to keep tight and straight. Number your accordion and glue together the following glue pages 2 and 3 , 4 & 5, 6 & 7, 8 & 9 and 10 & 11.  


List of tools:    A stamping Bundle, cardstock, designer paper, ink pads, snips, adhesives and cutting and scoring tools. You are ready to assemble. If you need help, you may contact me through my Facebook page:  https://www.facebook.com/Renees-Paper-Crafts- 


A different kind of pop up Z Fold


Annual crafting Retreat May 5 th & 6th, 2023                                                          By: Renee Ewart  Inverted Z Fold thanks to Susan Campfield for her inspiration.


See video here https://youtu.be/V2yqDTxSrhI


Materials & Measurements: first measure t represents direction

Card base can be any color : 11  by 4 ¼  scored on long side at 5 ½ ,4 ½  and 2 ¼  

Steps: 

I glue down the 4 by 5 ½ dsp piece to the back of the 1 ¼ inch strip at  front of the card. I then place the ½ inch strips at right edge of inside card and the other up against the right edge of 1 ¼ inch front piece of card. Then I stamp all my pieces . You will glue the dsp 3 by 41/4 piece with the stamped  image piece that is the 2 ¾ by 4. Now glue to center front of card and add embellishments. 

List of tools: 

 A stamping Bundle, cardstock, designer paper, ink pads, snips, adhesives and cutting and scoring tool. *You are ready to assemble : if you need help you may contact me through my Facebook page:  https://www.facebook.com/Renees-Paper-Crafts- 


Front DSP design fancy fold


Annual crafting Retreat May 5 th & 6th, 2023                                                          By: Renee Ewart                              Designer Paper ¾ Fancy fold             

Materials & Measurements: (first measurement represents orientation) 

Card base can be any color : 8 ½  by 5 ½  scored on long side at 4 ¼ and front of card cut at 3 inches leaving 1 ¼ behind - cardstock left behind will be used for front of card and label  : if cardstock is white cut to  2’¾  by  4  ( if too dark for stamping substitute for white cardstock. White Cardstock scrap:  for  punch out or die cut  image and/ or larger label   Embellishments : ribbon and or sequins                                                                                   Designer paper : 3 by 4 ¼ as frame for stamped area. 2 strips at ½ by 5 ½.                                          Inside cardbase: (if not  not white )then you will need white cardstock  which will be around 3 ½ by 5 ¼.

Steps: 

I glue down the 4 by 5 ½ dsp piece to the back of the 1 ¼ inch strip at  front of the card. I then place the ½ inch strips at right edge of inside card and the other up against the right edge of 1 ¼ inch front piece of card. Then I stamp all my pieces . You will glue the dsp 3 by 41/4 piece with the stamped  image piece that is the 2 ¾ by 4. Now glue to center front of card and add embellishments. 

List of tools: 

 A stamping Bundle, cardstock, designer paper, ink pads, snips, adhesives and cutting and scoring tool. *You are ready to assemble : if you need help you may contact me through my Facebook page:  https://www.facebook.com/Renees-Paper-

Retreat Pinwheel Tower Card


Annual Crafting Retreat 

May 5th & 6th, 2023 

By: Renee Ewart 

Pinwheel Tower card thanks to MaryKate Scott and Francis Wagner for the inspiration.

Materials & Measurements: 

First measurement represents orientation.

Card base Tower: 4 ¼ by 4 ¼ piece of cardstock scored at 1, 2, 3 and 4.  Card base Pinwheels: cut 4 pieces of cardstock 2 ¾ by 4 ¼. Cut one piece of White cardstock at 2 ½ by 4 to lay over one of the pinwheels.  Scrap white cardstock for stamping and die cutting or punching images for saying.                                      

Designer Paper: 3 (4 by 4) and 1 (1 ½ by 4) – all coordinating. The 3 pieces will be cut 1 ½ inches from the left side to the right, to save the integrity of the image. Place the left edge of the front of the dsp facing you at 1 ½ inches and cut.

Designer Paper: 3 (4 by 4) and 1 1 ½ by 4 - All coordinating. The 3 pieces will be cut 1 ½ inches from the left to the right to save the integrity of the image.  Place left edge of front facing you at 1 ½ inches and cut.

Steps: 

Scored CSB tower: Fold to create a cube and glue ¼ inch flap onto the last piece to create the tower. Now glue each of the pinwheels to the sides moving in one, same direction. For example let’s say you choose to glue the left edge to a face of the tower, continue moving left and gluing the left edge to the next face until all 4 faces have the 2 ¾ by 4 ¼ cardstock glued down.  You are now ready to glue your DSP. Choose your arrangement carefully, if you want to maintain your images the ½ inch strip is adhered to the left and its partner to the right.  Continue until you reach the end of your matching pieces. Now you will take the white piece that is 2 ½  by 4 and glue it onto the right panel  and the extra DSP will be glued on the left.  You are ready to adorn as you wish.   

List of tools:  A stamping Bundle, cardstock, designer paper, ink pads, snips, adhesives and cutting and scoring tool. You are ready to assemble. : If you need help, you may contact me through my Facebook page:  https://www.facebook.com/Renees-Paper-Crafts Directions on YouTube will be coming in the Nextel

Wednesday, March 1, 2023

Small and medium baskets

I made these and more  baskets. There are 2 sizes and are quick and easy. Dimensions are given during video and below The larger size basket dimensions are given as well. Please check out video here:  https://youtu.be/6oAk0ktM_xQ
Also, if you would like to see more of my work and info check out my Facebook page here :  https://www.facebook.com/itisallfun


Dimensions for smaller basket are:
Cardstock : 8 3/4 by 7 ; scored on all sides @ 2 1/4 
Handle ( first cut the 8 1/2 side to 7 for handle ) 1 1/4 to 1 1/2 depending on your preference by 8 
DSP : handle 1 by 10 to 11 ; for the inside 4 by 2 1/4  ; 2 of these for sides ( if you did not die cut 2 by 4)  1 1/2 by 4 ; finally 2 of these 2 by 2 1/4 
Dimensions for larger basket are : Cardstock is an 81/2 by 11 
Score at  2 inches all the way around 
Handle : 12 by 1 3/4 double strips glued together if using dsp.
Dsp : inside 41/4 by 6 3/4 ;  2 (4 1/4 by 1 3/4 ) and 2(6 3/4 by 1 3/4 ) 
 

Monday, November 14, 2022

10 of 10 weeks of fall!!! Oops winter ! The best is sweet candy cane

 Annual catalog only November 15-18 ONLY.

10% off all PUNCHES

15% off all STAMPS

20% off all DIES, EMBOSSING FOLDERS and "non-specialty" Designer Series Paper see rest very important.   

Use https://reneeewart.stampinup.net/ to shop  

NOTE:  If there are bundles you want, order the stamps and dies/punches as separate items to get these discounts which are better than the bundle savings!

In this video https://youtu.be/Li2-vOi7d7M  you will see how the Christmas Scottie, the celebrate with tags and cup of tea work so well with sweet candy cane   


Sunday, November 6, 2022

How to make a luminary with the hoho paper pumpkin

Paper pumpkin October 2022 Alternates

 Here is a card and a luminary alternatives for the hohoho paper pumpkin that I intend to hang off the Christmas tree. The tee light  is adhered to by tear and tape. Simply add the tear and tape around the tee light and then cut about an 1/8  to 1/4 of an inch off the end of the crumb cake die cut. Then wrap. I did cut an envelope to make the bands and the handle. You can use the other striped piece from the kit for the handle. The strips are 1/2 inch by 3 inches. I did place 4 strips 2- sides from and back. I covered the seam with the back strip. 

The card is embossed with the winter time 3D smaller embossing folder that is made for the mini cut and emboss machine. Worked beautifully and any of these minis could be used. I added the white craft stampin ink on the folder with a dauber. Interested in stampin up paper pumpkins you can order here  https://www.paperpumpkin.com/subscribe?demoid=2223448   If they ask for demonstrator look for me Renate (Renee) Ewart 


Earth and Elegance suite fancy folds

 I really enjoyed making these cards I feel the style of this fancy fold is perfect for this designer paper and suite.   Here is the video l...