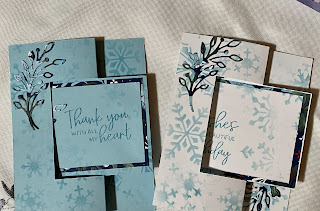
This is #7 of 10 weeks of fall ! So here I have a flip card design using the framed florets. The first half of video is how to incorporate your label and sentiment into your card without it looking like an add on to the card. Example photo below of what was discussed with many more examples on video. Even with the flip card I make sure the sentiment blends in with the card thru masking the snowflakes. 2nd half of video is the card instructions. The Blue card on the left is completely symmetrical i.e. either side can be the front. If that is what you are going for keep images to the right. The white card is not. I kept sentiment on left so only flowers are front of card. Both work but blue on is better.
Cardstock needed : 5 1/2 x6 3/4 - Will be cut and scored *Long side cuts : start and in at 1 1/4 and cut down to 41/4 - do this to both top and bottom . *Short side cuts : start at 1/4 down and over to 2 3/4 - this cut occurs 4x - top- bottom -left -right **Scoring long side from top to 1 1/4 @2 3/4 and 4 Repeat for bottom


No comments:
Post a Comment