
I made these and more baskets. There are 2 sizes and are quick and easy. Dimensions are given during video and below The larger size basket dimensions are given as well. Please check out video here: https://youtu.be/6oAk0ktM_xQ
Also, if you would like to see more of my work and info check out my Facebook page here : https://www.facebook.com/itisallfun


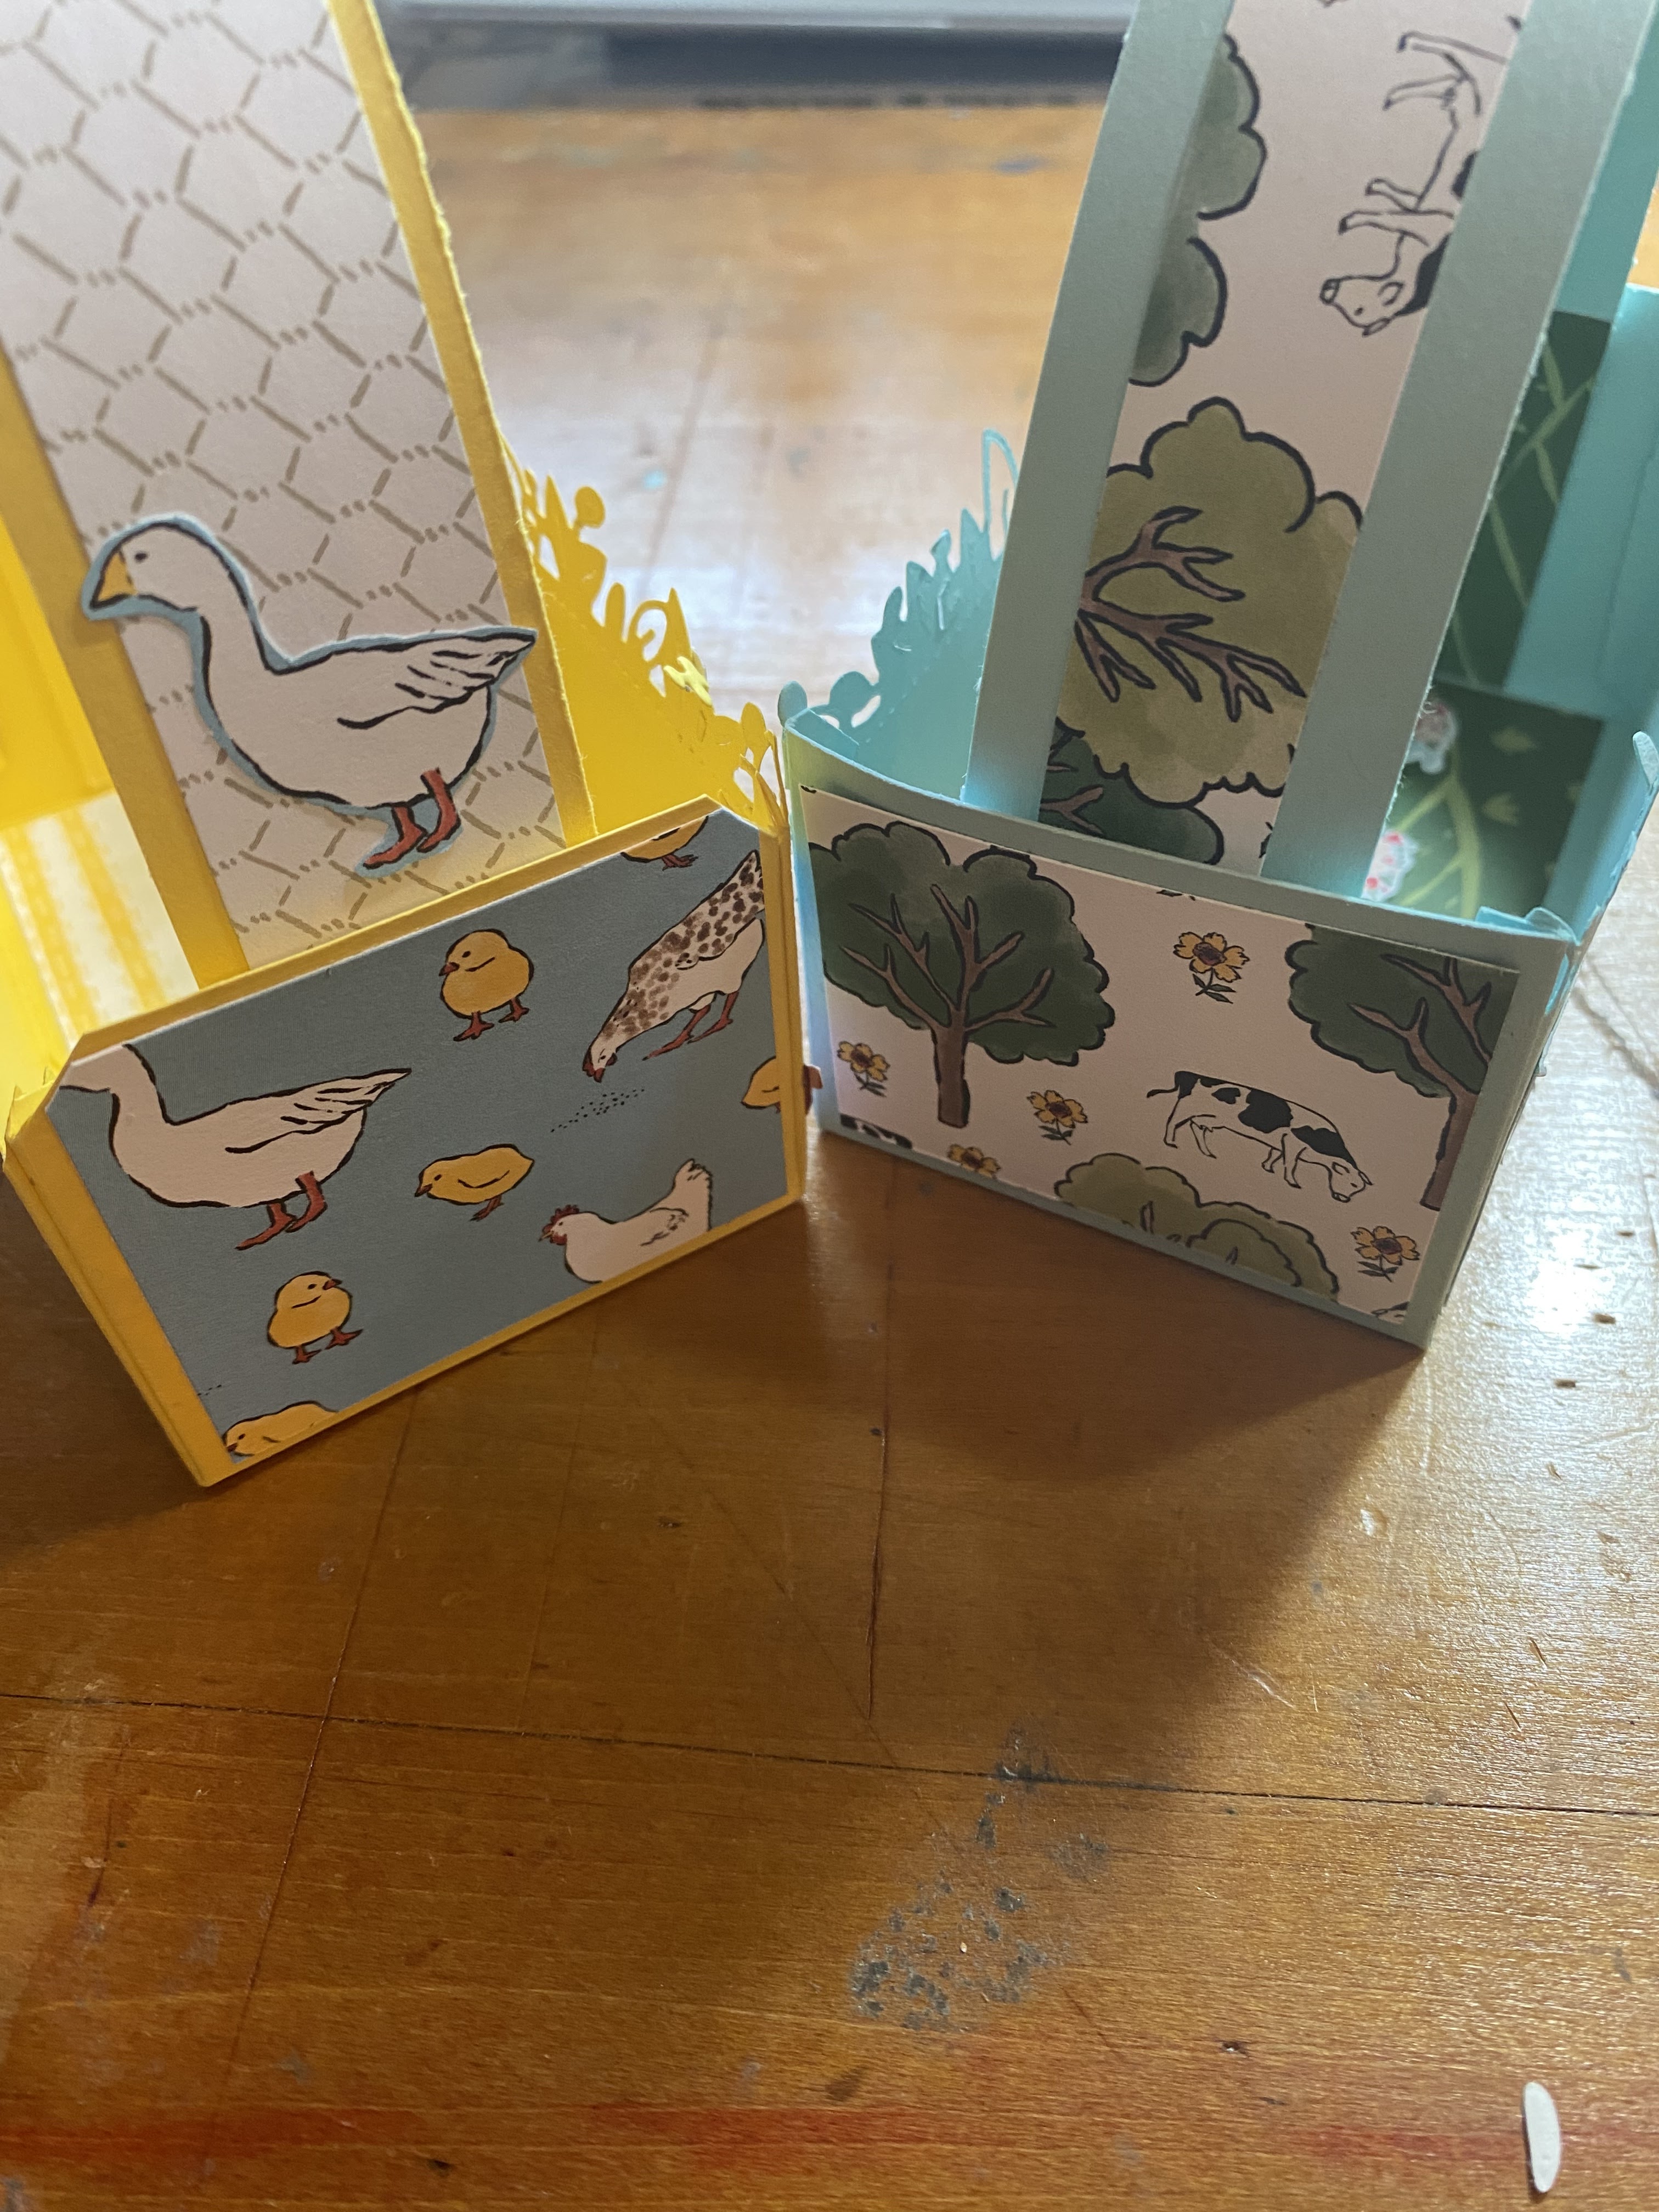
Dimensions for smaller basket are:
Cardstock : 8 3/4 by 7 ; scored on all sides @ 2 1/4 Handle ( first cut the 8 1/2 side to 7 for handle ) 1 1/4 to 1 1/2 depending on your preference by 8
DSP : handle 1 by 10 to 11 ; for the inside 4 by 2 1/4 ; 2 of these for sides ( if you did not die cut 2 by 4) 1 1/2 by 4 ; finally 2 of these 2 by 2 1/4
Dimensions for larger basket are : Cardstock is an 81/2 by 11
Score at 2 inches all the way around
Handle : 12 by 1 3/4 double strips glued together if using dsp.
Dsp : inside 41/4 by 6 3/4 ; 2 (4 1/4 by 1 3/4 ) and 2(6 3/4 by 1 3/4 )


